Bright and Beautiful Stamp Camp- Let’s Craft Together

Let’s Craft Together….

Join myself, and the rest of the Let’s Craft Together Team for a day of crafting at Bright and Beautiful Stamp Camp

We are so excited to be able share this Online Event with you and hope you are excited too!

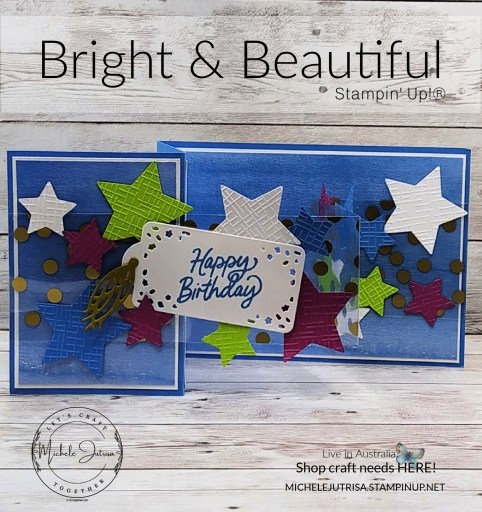
We loved the ‘Rain or Shine’ Suite Collection as soon as we saw it and just thought ‘How cute!’ and our heads have been brimming with lots of ideas we just have to share with you. So please join us.

We have thought long and hard about how we were going to share this with everyone….weather your a customer, overseas or another Demonstrator, we want you all to join us

Date: 10th June 2023

Time: All Day

Where: Facebook Event – we will send you the links to the event closer to the day

Information about the Stamp Camp

We will be creating 8 cards, 2 from each of us over the day via a Facebook Group (Closed) that only you will have access to. We will have challenges for you to try also through out the day.

What to expect from the camp.
  • PDF Tutorial showcasing 8 projects made with the Bright and Beautiful Suite Collection
  • Exclusive Facebook Page with a life time access. There will be 8 ‘LIVE” presentations through out the day for you to craft along with us or at your leisure.
  • Open to anyone one, here in Australia or Overseas. Also if you are a Stampin’ Up! Demonstrator you can sign up as well. See all the payment options below.
  • You will receive all measurements 2 weeks before the Stamp Camp so you can be prepared to craft along with us
  • Card Kits (Australia Only) are available for you to purchase, these will be cut to size and die cut ready to go. See Below
  • All measurements will be in both A4/metric and Letter/Imperial
What do you need to have
  • All your crafting supplies..cardstock, inks and adhesives
  • Paper Trimmer and snips
  • And be ready for some FUN!

Purchase Options

Option 1: Bright and Beautiful Suite, Iridescent Shaker Circles & Ribbon Combo $166.69

To purchase these products CLICK HERE and ‘Add all to Cart’ Make sure you add the Host Code to your Order : FVCFVZG2 before finalising your order.(Ordered directly through Stampin’ Up!)

To complete your cards we have added to the suite Gold & Silver trim combo Pack and the Iridescent Shaker Circles.

Purchase the suite, and you will get the tutorial bundle free plus access to the Stamp Camp Exclusive facebook Page.

Option 1a: Discounted Card Kit $25.00 (including Postage), when purchased Option 1

If you chose Option 1 you may want to add the Card Kit (see option 2) . The Card kit is purchased directly from me for a discounted price of $25.00 (including postage).

**Please note, the suite will be purchased directly from Stampinโ€™ Up! but the add on kit needs to be purchased through me. Links below


Option 2: Card Kit $49 (including Postage)

If you already have the suite, you can purchase the kit and tutorial for $49.00.

The Card Kit comprises of all cardstock (ONLY) to make 8 cards and it includes Stamp Camp Exclusive Facebook Page + Tutorial


Option 3: Product Share Cost $65 (including Postage)

If you donโ€™t want a full pack of DSP, ribbon and embellishments, but you want the everything else, you can buy a product share plus the kit for $65.00 (including postage). Includes Stamp Camp Exclusive Facebook Page + Tutorial

The product share comprises of…

  • 1/4 pack of the Bright & Beautiful DSP,
  • 1/4 pack (2.25m) of each of the gold and silver trim from the combo pack
  • 1/4 pack of the Iridescent Shaker Circles.

You can purchase the Beautiful Balloons bundle by clicking here. The bundle can be purchased directly from Stampinโ€™ Up but the kit and product share will have to be purchased directly from me


The above options are only available to Australian residents.


Option 4: PDF Only $22 Demo’s or Overseas

Anyone worldwide can purchase the PDF and includes the Stamp Camp Exclusive Facebook Page – PDF will be available closer to date of Stamp Camp.


Bright & Beautiful Stamp Camp

A list of product measurements will be sent to you at time of Registration

I hope you can Join us, if you have any questions please contact me at michele@jutrisa.com

Join My Team

If you have been sitting on the fence not sure if you should JOIN the Stampinโ€™ Up! Family or notโ€ฆ.well now is the time to jump down and JOIN.

If you enjoyed this post, please be sure to . . . 

Bright & Beautiful – May Fun Fold Challenge

Welcome to Let’s Craft Together Blog Hop. We are a group of Australian Stampinโ€™ Up!ยฎ Demonstrators that are coming together to share our creative ideas with you. We are happy that you can join us and hope that we can Inspire you to make creations of your own. Each month we will be showing different ideas based around products, themes and challenges.

Thank you Kylie for this fun challenge, Double Z-Fold cards are a easy & fun. There are so many great variations to the Z- Fold Card…check out this Pinterest page on Z-Fold Cards using Stampin’ Up! Products.

Bright & Beautiful Double Z- Fold Card

I created my card using the Bright & Beautiful Suite from the NEW Annual 2023-24 Stampin’ Up!ยฎ Catalogue. If you love Birthdays, Balloons and stars this is a fun suite. Great for birthday cards, general celebrations or any special moments. The dies cut balloons, stars, tags and work well for shaker cards. The Bright & Beautiful Designer Series Paper (DSP) is 6 x 6″, one side of the DSP has fun type images of stars, strips, waves, strips and confetti. The reverse side has ombre effects, variegate or shabby (as per my card), giving great texture effects for your cards.

The DSP coordinates with Berry Burst, Bubble Bath, Lemon Lime Twist, Pretty Peacock, Azure Afternoon and Blueberry Bushel. For my card I used the Azure Afternoon DSP and die cut stars in Berry Burst, Basic White, Azure Afternoon and Parakeet Party.

To add some extra texture to the stars I embossed them using one of the Basics 3D Embossing Folder found on the Online Exclusives in my Online Store.

The Bright & Beautiful Suite also includes Gold celebration Specialty Designer Series Paper – window sheets in 3 designs – spots, stars and confetti, streamer twirls. One side of the sheets are gold and the other side is in silver. I used the gold spots for the 2nd part of the Double Z-Fold, to create a see through element to my card. I was then able to attach the stars and tag to the window sheet so the stars and tag look like they are floating.

NB: make sure you use your bone folder to crease in the folds and to adhere to the card base I used lots of glue dots that hind nicely behind the dots.

On the back of the card I have added a panel to write your Birthday Greetings on.

Thank you for stopping by and reading my Blog. I hope you have enjoyed my projects & that you’re inspired to get crafty!  

You may be starting here or have come from someone elseโ€™s blog โ€“ either way there is a list at the end of this post to help you move around all the different blogs and get many amazing ideas. We all have our country listed โ€“ so if you are looking for a demonstrator in your country, these demonstrators would love to look after you with your Stampinโ€™ Up! ยฎ shopping or if you would like to join our Stampinโ€™ Up!ยฎ teams.

Follow the Hop here..

Stampin’ Up! products used in today’s Project

Product List

Online Exclusives

To all the Online Exclusives click HERE or on the image below, this items will not be found in the catalogues so check back throughout the year to see what is new.

Join My Team

If you have been sitting on the fence not sure if you should JOIN the Stampinโ€™ Up! Family or notโ€ฆ.well now is the time to jump down and JOIN.

If you enjoyed this post, please be sure to . . . 

Regency Park # 004 Mystery Challenge – Let’s Craft Together Blog Hop

Welcome to Let’s Craft Together Blog Hop. We are a group of Australian Stampinโ€™ Up!ยฎ Demonstrators that are coming together to share our creative ideas with you. We are happy that you can join us and hope that we can Inspire you to make creations of your own. Each month we will be showing different ideas based around products, themes and challenges.

This month Tracy has challenged us with a ‘Mystery Challenge’. It’s good every now and then to be taken out of your comfort zone to make something different from your style.

Regency Park by Stampin’ Up!ยฎ

I decided to use products from the Regency Park Suite Collection for my card. The DSP I wanted to be very neutral so the stamping became the focal point.

How to make this card…

Cutting Measurements

PaperColourImperial/LetterMetric/A4
Card Baseย Basic White8ยฝ x 5 ยฝโ€, score @ 4ยผ”14.9 x 21cm, score @ 10.5cm
Piece 1ย Basic White3ยพ x 3ยฝ”9.5 x 7cm
Piece 2ย Basic White2 x 1ยฝ”5 x 4cm
Piece 3ย Balmy Blueย 4ยผ x ยฝ”ย 10.5 x 1cm
ย Piece 4ย Mango Melodyย 4ยผ x ยผ”ย 10.5 x 0.5cm
DSP4ยผ x 1ยผ”10.5 x 3cm
  • Card Base –
    • Stamp the front of card base with the leaf cluster stamp from the Petal Park Stamp Set. This stamp has two sets of leaves that come in towards the center. I took care and only inked up half of the stamp (to the center) and stamped around the card base front using Granny Apple Green Ink Pad.
    • I used the dot-age stamp to fill in some of the holes around the leaves.
    • Using a Blending Brush and working in a circular motion lightly add Granny Apple Green Ink around the edges of the card base.
  • Piece 1
    • Stamp the out line flower cluster from the Sentimental Park Stamp Set in Balmy Blue all over the Basic White cardstock.
    • Using Blamy Blue ink and stamping off to get a lighter tone use the fill in Stamp for the flowers
  • Piece 2
    • Stamp sentiment in Night of navy Ink
  • Piece 3 & 4
    • Balmy Blue Strip and Mango Melody Strip run through Basic 3D Embossing Folders – I used the ‘Hash’ folder, this is a similar design to the DSP I used.
  • Putting the card together
    • Adhere the DSP to underneath side of the Piece 1, on the left
    • Glue these two pieces (P 1 & DSP) to the card base.
    • Using multi-purpose glue adhere Pieces 3 & 4 across the width of the card towards the bottom of the already attached pieces (see my card for position)
    • Add dimensionals to Piece 2 and adhere to your card over the strips (3 &4)
    • Tie a large bow with white bakers twine, add a glue dot and position the bow under the bottom left corner of the sentiment.

Thank you for stopping by and reading my Blog. I hope you have enjoyed my projects & that you’re inspired to get crafty!  

You may be starting here or have come from someone elseโ€™s blog โ€“ either way there is a list at the end of this post to help you move around all the different blogs and get many amazing ideas. We all have our country listed โ€“ so if you are looking for a demonstrator in your country, these demonstrators would love to look after you with your Stampinโ€™ Up! ยฎ shopping or if you would like to join our Stampinโ€™ Up!ยฎ teams.

Follow the Hop here..

Stampin’ Up! products used in today’s Project

Product List

View Mini Catalogue or Shop on Line Here


5 January – 1 May 2023
View Online | Shop Online

Join My Team

If you have been sitting on the fence not sure if you should JOIN the Stampinโ€™ Up! Family or notโ€ฆ.well now is the time to jump down and JOIN.

If you enjoyed this post, please be sure to . . . 

Regency Park #003 Sketch Challenge – Let’s Craft Together Blog Hop

Welcome to Let’s Craft Together Blog Hop. We are a group of Australian Stampinโ€™ Up!ยฎ Demonstrators that are coming together to share our creative ideas with you. We are happy that you can join us and hope that we can Inspire you to make creations of your own. Each month we will be showing different ideas based around products, themes and challenges.

Our challenge this month is a Sketch Challenge by Maheswari. I love the layers of two frames that are slightly twisted, with decorative elements on diagonal corners.

Regency Park

For my card I have used the Regency Park Suite by Stampin’ Up!ยฎ and to create my card I used manly the Petal Park Bundle. This is such a simple bundle to use, you can colour the flowers by hand with any medium you wish or use the stamps to colour the flowers. The suite includes a simple simple punch to make cut out the flowers and one leaf quick and easy.

The suite consists of two Bundles

  • Petal Park Bundle 160577 Flowers & leaf stamps plus the Punch
  • Sentimental Park Bundle 160567 – Sentiments, more flowers & leaves and Dies

It then has other items in the suite including

  • Textured 12 x12 Shimmer Paper
  • Can Weave 3D Embossing Folder
  • Night of Navy Boardered Ribbon
  • Adhesive Backed Milky Dots
  • Regency Park 6 x 6 DSP

I created the two rectangle frames cut from the Rectangle Stitched Frames and Basic White Cardstock.

The Flowers are coloured with Watercolour Pencils onto Basic White Cardstock. Instead of Blending the pencils water or Blender Pens I have used Memento Ink and Blends Colour Lifter. Patty Bennett did a very good video on this technique – Blending Watercolor Pencils with Color Lifter

How to make this card…

  • Card Front – Embossed, I used for this one of the Basic 3D Folders 161598 from the Online Exclusive, you could of course use the 3D embossing folder that comes with the suite, but I wanted something a little more subtle.
  • Frames – Placing one die side of the other, die cut 2 frames.
  • Flowers Stamping – Stamp 3 sets of flowers and 8 leaves using Memento Tuxedo.
  • Flowers, coloured with pencils and blended with Blends Colour Lifter
    • Large flowers – Balmy Blue and Night of Navy
    • Medium Flowers – Flirty Flamingo, Mellon Mambo & Daffodil Delight
    • Small Flower – Gorgeous Grape & Mellon Mambo
    • Leaves – Old Olive & Granny Apple Green
  • Bakers twine split and added under flowers
  • Sentiment – Embossed in White Embossing Powder
  • Card Insert – Insert strip embossed with the 3D Embossing Folder

Cutting Measurements

PaperColourImperial/LetterMetric/A4
Card Base Basic White Thick Cardstock4 ยผ x 11โ€, score @ 5 ยฝโ€10.5 x 29.9cm, score @ 14.9cm
Card Front Basic White Card stock4 x 5 ยผโ€10 x 14.4cm
Frames Basic White Card stock3ยฝ x 4ยฝ” x 29 x 12cm x 2
FlowersBasic White Card stock4 ยผ x 5ยฝ”10.5 x 14.9cm
SentimentBasic Black1ยฝ x 3″3 x 8cm
Card InsertBasic White Card stock  4 x 5 ยผโ€ 10 x 14.4cm
Card Insert Strip Basic White Card stock 1 x 4″ 2.5 x 10cm

Thank you for stopping by and reading my Blog. I hope you have enjoyed my projects & that you’re inspired to get crafty!  

You may be starting here or have come from someone elseโ€™s blog โ€“ either way there is a list at the end of this post to help you move around all the different blogs and get many amazing ideas. We all have our country listed โ€“ so if you are looking for a demonstrator in your country, these demonstrators would love to look after you with your Stampinโ€™ Up! ยฎ shopping or if you would like to join our Stampinโ€™ Up!ยฎ teams.

Follow the Hop here..

Stampin’ Up! products used in today’s Project

Product List

View Mini Catalogue or Shop on Line Here


5 January – 1 May 2023
View Online | Shop Online

Join My Team

If you have been sitting on the fence not sure if you should JOIN the Stampinโ€™ Up! Family or notโ€ฆ.well now is the time to jump down and JOIN.

If you enjoyed this post, please be sure to . . . 

Rain or Shine #002 -Let’s Craft Together Blog Hop

Welcome to Let’s Craft Together Blog Hop. We are a group of Australian Stampinโ€™ Up!ยฎ Demonstrators that are coming together to share our creative ideas with you. We are happy that you can join us and hope that we can Inspire you to make creations of your own. Each month we will be showing different ideas based around products, themes and challenges.

Our Theme this month is Rain or Shine Suite Collection. This is just a little taste of whats to come with our our first Stamp Camp happening on 4th March, which I hope you can join us...HERE are the details.

This card I have used my Blends to colour the Rabbit in and also some Paper Piecing to give him a coloured jacket.

I love a matted card front, it can give it a different feel or make what elements you use ‘POP!’. This card has a white on white card base and card mat. The DSP and Velum have been cut to size using the Deckled Rectangle Dies. The vellum making the fun little rabbit stand out.

How to make this card…

  • Adhere the DSP Panel to the Card Mat.
  • Using a small amount of Seal adhere the Vellum to the DSP, it is placed more to the left of the card. Make sure the placement of the seal will be hidden under the Rabbit.
  • A length of ribbon was wrapped around the card and attached behind the card mat.
  • Adhere the matted card front to the card base.
  • The Rabbit was stamped onto a piece of Basic White Cardstock using Tuxedo Black Memento Ink and also onto a piece of DSP.
  • He was coloured using Blends – Gray Granite and Flirty Flamingo.
  • Paper Piecing – The jacket was cut from the DSP using a craft knife and Glass Plate (see my Video on Fussy Cutting made on this a few years back)
  • After cutting the Rabbit using the coordinating dies adhere the jacket onto the Rabbit
  • With dimensionals attach the rabbit to your card front.
  • Tie a separate bow and adhered with a glue dot to the left of the Rabbit
  • Sentiment was stamped into a piece of Basic White cardstock and cut using one of the smaller Layering Circle Dies. Using one of the small blending brush blend on Balmy Blue ink around the edges. Adhere to card front with multi-pupose glue.
  • On the Card Insert I have also added a DSP strip and a length of Ribbon but instead of a bow I just tied a half knot, so as the card is not too bumpy inside.
  • Adhere the insert into the inside of the card.

Cutting Measurements

PaperColourImperialMetric
Card Base Thick Basic White4 ยผ x 11โ€, score @ 5 ยฝโ€10.5 x 29.9cm, score @ 14.9cm
Card Mat Basic White4 x 5 ยผโ€10 x 14.4cm
DSP3ยฝ x 5″9 x 13cm
Vellum2ยผ x 3ยฝ”6 x 9cm
Card Insert Basic White 4 x 5 ยผโ€ 10 x 14.4cm
 DSP Strip  ยพ x 5 ยผโ€ 2 x 14.4cm
CircleBasic White2 x2″5 x 5cm
RabbitBasic White2ยฝ x 2ยฝ “7 x 7cm
DSP Scrap1ยฝ x 1ยฝ”4 x 4cm

Thank you for stopping by and reading my Blog. I hope you have enjoyed my projects & that you’re inspired to get crafty!  

You may be starting here or have come from someone elseโ€™s blog โ€“ either way there is a list at the end of this post to help you move around all the different blogs and get many amazing ideas. We all have our country listed โ€“ so if you are looking for a demonstrator in your country, these demonstrators would love to look after you with your Stampinโ€™ Up! ยฎ shopping or if you would like to join our Stampinโ€™ Up!ยฎ teams.

Follow the Hop here..

Stamp Camp – Rain or Shine

I hope you can Join us on the 4th March for a fun day of crafting with the ‘Let’s Craft Together Team’.

All the details can be found HERE

Any questions please ask….hope to see you on the 4th

Stampin’ Up! products used in today’s Project

Product List

View Mini Catalogue or Shop on Line Here


5 January – 1 May 2023
View Online | Shop Online

View Sale-A-Bration Catalogue or Shop on Line Here

Stampin' Up! Sale-a-Bration Catalogue
5 January – 28 February 2023
View Online | Shop Online

Join My Team

If you have been sitting on the fence not sure if you should JOIN the Stampinโ€™ Up! Family or notโ€ฆ.well now is the time to jump down and JOIN.

If you enjoyed this post, please be sure to . . .