
Welcome to Let’s Craft Together Blog Hop. We are a group of Australian Stampin’ Up!® Demonstrators that are coming together to share our creative ideas with you. We are happy that you can join us and hope that we can Inspire you to make creations of your own. Each month we will be showing different ideas based around products, themes and challenges.
Thank you Kylie for this fun challenge, Double Z-Fold cards are a easy & fun. There are so many great variations to the Z- Fold Card…check out this Pinterest page on Z-Fold Cards using Stampin’ Up! Products.

Bright & Beautiful Double Z- Fold Card
I created my card using the Bright & Beautiful Suite from the NEW Annual 2023-24 Stampin’ Up!® Catalogue. If you love Birthdays, Balloons and stars this is a fun suite. Great for birthday cards, general celebrations or any special moments. The dies cut balloons, stars, tags and work well for shaker cards. The Bright & Beautiful Designer Series Paper (DSP) is 6 x 6″, one side of the DSP has fun type images of stars, strips, waves, strips and confetti. The reverse side has ombre effects, variegate or shabby (as per my card), giving great texture effects for your cards.
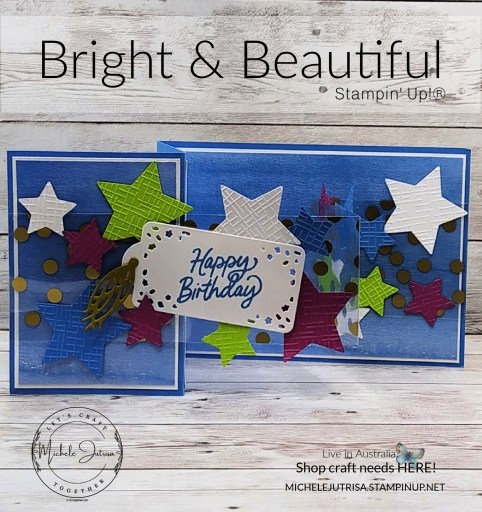
The DSP coordinates with Berry Burst, Bubble Bath, Lemon Lime Twist, Pretty Peacock, Azure Afternoon and Blueberry Bushel. For my card I used the Azure Afternoon DSP and die cut stars in Berry Burst, Basic White, Azure Afternoon and Parakeet Party.
To add some extra texture to the stars I embossed them using one of the Basics 3D Embossing Folder found on the Online Exclusives in my Online Store.

The Bright & Beautiful Suite also includes Gold celebration Specialty Designer Series Paper – window sheets in 3 designs – spots, stars and confetti, streamer twirls. One side of the sheets are gold and the other side is in silver. I used the gold spots for the 2nd part of the Double Z-Fold, to create a see through element to my card. I was then able to attach the stars and tag to the window sheet so the stars and tag look like they are floating.
NB: make sure you use your bone folder to crease in the folds and to adhere to the card base I used lots of glue dots that hind nicely behind the dots.
On the back of the card I have added a panel to write your Birthday Greetings on.

Thank you for stopping by and reading my Blog. I hope you have enjoyed my projects & that you’re inspired to get crafty!
You may be starting here or have come from someone else’s blog – either way there is a list at the end of this post to help you move around all the different blogs and get many amazing ideas. We all have our country listed – so if you are looking for a demonstrator in your country, these demonstrators would love to look after you with your Stampin’ Up! ® shopping or if you would like to join our Stampin’ Up!® teams.

Follow the Hop here..
Stampin’ Up! products used in today’s Project
Product List")


Online Exclusives
To all the Online Exclusives click HERE or on the image below, this items will not be found in the catalogues so check back throughout the year to see what is new.

Join My Team
If you have been sitting on the fence not sure if you should JOIN the Stampin’ Up! Family or not….well now is the time to jump down and JOIN.
If you enjoyed this post, please be sure to . . .
Stunning card, Michele!
Thank you Maheswari
Love this Michele. I like the crosshatch 3D embossing folder you used on the stars.
It’s my favorite embossing folder at the moment